Tag Archives: how to / diy / tutorial

DIY Sheer Tints Nail Polish

Purchased – No Affiliate Links

Lately, I’ve seen a lot of hype around the OPI Sheer Tints polishes and Sally Hansen Palm Beach [super sheer] Jellies.  If you haven’t seen swatches, Frazzle and Aniploish has excellent comparisons of both here.  However, I have heard bad things about the OPI formula and the sheerness of the Sally Hansens, so I though I’d experiment with making my own sheer tints.

DIY Sheer Polish-2-2

The Ingredients

They were very, very simple to make. I used red, yellow, and blue NYC polishes I already had (swatched here).  You can use cremes or jellies, but make sure that they don’t have a strong white base – that won’t work as well.

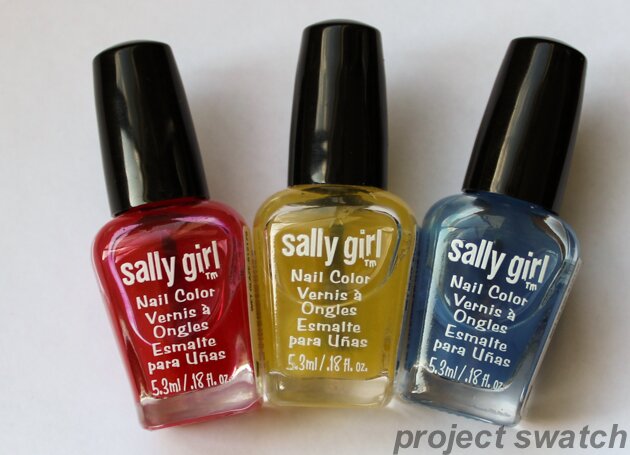
I wanted to make small bottles, so I bought inexpensive Sally Girl clear polish (you can use any clear polish or top coat, or use suspension base).  I simply poured out enough clear polish so that I could fit 3-4 drops of colored polish in the bottles, added the colored polish drops, shook the bottles, and voilà! Sheer tints!
DIY Sheer Polish-3

DIY Sheer Polishes

They are a touch streaky (which could probably be fixed by mixing them more thoroughly), but work beautifully for nail art, which is why I wanted them in the first place.
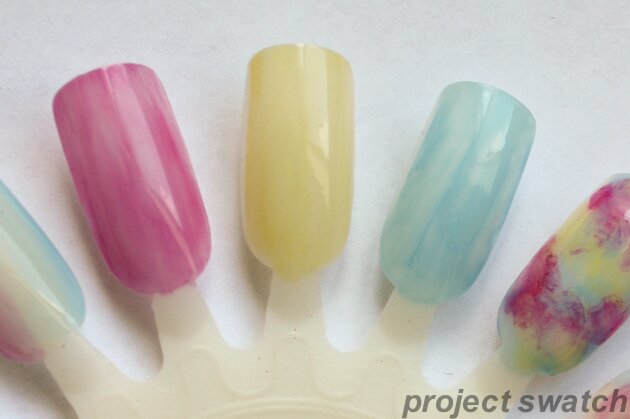
DIY Sheer Tint Polish

One coat of each; the red is a little bit more opaque than I intended, and you can see that they’re a bit streaky.
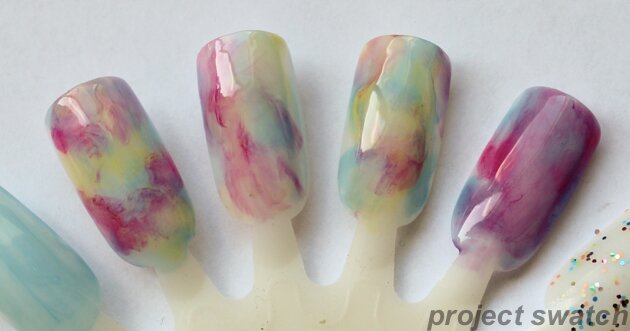
DIY Sheer Polish

Super easy nail art!

Do you ever franken (mix) your own nail polishes?

// //

How To: Washing Makeup Brushes

Purchases & Press Sample – Affiliate Links

Part of my arsenal of cleaners – I have larger sizes of all of these that I decant into the smaller bottles for ease of use.

I’ve been meaning to put together a post for a while on how I wash my brushes, and this is it! I’m going to discuss options for washing brushes generally, plus discuss how I wash my brushes & why. Warning: this post is very long!
Continue reading

DIY – Using an ELF Compact as a Travel Eyeshadow Palette

DIY Freestyle compact – with 4 Inglot shadows and one WnW


I’ve recently had good luck with several ELF products, but I do find the brand hit-or-miss. However, even when I have a miss with a product in a compact, I’ve figured out a way to repurpose the compact that makes it worth the $1.50 to $3 that I paid!

Take this translucent mattifying powder that I recently purchased – it looked fine at first:


But, after a swipe or two with the sponge, this was revealed:


Very lumpy, bumpy, and not my kind of powder! So, I took a knife and pried it the pan out of the compact; I wasn’t careful, because I was planning to toss the powder. However, ELF pans are very loosely attached with glue, so if you are careful, you can remove them without harming the powder – or you can do the second step (show below) first, then use heat to loosen the glue.

After the pan was removed, I was left with this:

ELF compact – no pan

Then, I took my knife again, and pried the insert out of the pan, which left me with an empty pan with just a tiny spot of glue in it:

Empty ELF Compact

And you’re done! This whole process takes less than five minutes, and you are left with a sturdy, small compact with a mirror. You can glue in a magnetic sheet to make a magnetic freestyle compact; use doubleside tape to stick in pans, or just glue in the pans. I made my mom a small compact of eyeshadows and glued in the pans with the first one I did, and haven’t used the second one yet – I’ll probably end up using double-sided tape.

Here’s the first photo again, as an example of how you can fill the compact. These pans aren’t attached, I’ve just placed them in the compact to demonstrate. Four Inglot eyeshadows fit in really nicely, leaving a little bit of space for a Wet n Wild or similarly sized eyeshadow.


——–

This post is from Project Swatch. All rights reserved.