Today, I thought it would be fun to take a look at what’s in my manicure bag! I do all my nail polishing and swatching outside, so I have everything I need together in a medium – sized Sephora bag, so I can head outside any time and have everything I need with me. I just grab the polish (or polishes) I want, my bag, and I’m ready to go!
One of the most important things I have with me is nail polish remover. I have two types in my bag: pure acetone, and a homemade version of Zoya’s Remove+. I usually use the homemade version of Remove+ to remove nail polish, because it’s more moisturizing than pure acetone – it’s made of acetone, glycerin, and water, and I learned how to make it from this post on the blog Loodie Loodie Loodie. I use the acetone for stubborn polishes (usually glitter), for my pedicures, and to clean up the edges of my manicures with a brush.
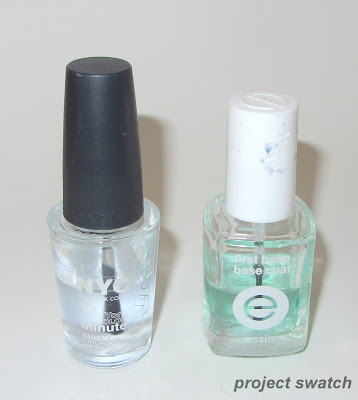
My favorite top & base coats
|
|
I also keep my favorite base coat and top coat in my nail bag. I’m still using Essie First Base basecoat (which I -->posted about --> quite a while ago). I find that most topcoats make my nail polish peel off in sheets, so I usually skip topcoat. If I’m wearing a polish that requires topcoat (for example, a rough glitter), NYC Grand Central Station is my favorite – it rarely leads to the peeling nail polish problem.

My favorite white & black creme polishes
|
|
Several of the polishes I wear require a coat of a solid color first. Neons work alone, but pop more with white underneath, and some duochromes look best over black. I find it convenient to just leave my favorite white and black creme in my manicure bag all the time. My current favorite white is Milani High Speed Fast Dry in White On the Spot, but I’d love to find something a bit less streaky. And I love Wet n Wild Wild Shine in Black Creme – it’s one coat of perfect black glossiness.

Decanted Blue Cross cuticle remover, nail polish thinner,
quick dry spray
|
|
Some miscellaneous but important items: my favorite cuticle remover is Blue Cross, but it’s very watery and hard to use. Then, I read the wonderful idea of putting it in a clean nail polish bottle. I just brush a little on my cuticles, let it sit for a minute, then gently push them back.
I can’t believe I didn’t own nail polish thinner until Mimi at Makeup Withdrawal wrote about it a few months ago. Her post convinced me that I needed it immediately – and really, I did. If you ever paint your nails, go buy nail polish thinner – you’ll be glad you did! It’s only a couple dollars (I think mine was $4?) and it makes thick, gloopy, and aging nail polish like new again. You can even use it to revive totally dried out nail polish.
The quick dry spray is not a necessity; I’m not sure how much it actually speeds up the drying process. However, it’s fairly moisturizing. When my fingers are too dried out from nail polish removal to photograph, I paint them anyway. Then afterwards, I spray them with the quick dry spray – it moisturizes them enough that they look fine in photographs. Once the nail polish is 100% dry, I can apply a cuticle cream (I don’t photograph nail polish when it’s wet, but I photograph it when the top layer is dry, but it’s still dentable).

Nail tools
|
|
And finally, some tools. Cotton squares for removing nail polish; the ELF $1 concealer brush is my clean-up brush; an orangewood stick for pushing back my cuticles, and a no-name glass file I got for $2 at Big Lots.
Below is the bag I use. I usually have a couple more items than those listed above kicking around in it – some nail polishes, a swatch wheel, a sharpie to label the swatch wheel, along with various other bits and pieces.
Do you have a manicure bag, or nail art supply bag? How do you organize your nail stuff? I’d love to see!


