Sally Hansen Insta-gel nail strips – Amazing Lace |
Last week, I found a display with the new Sally Hansen Insta-gel nail strips, which promise up to two weeks of wear. They’re quite expensive for a drugstore nail product – around $15 – especially considering that one package is meant to be one manicure (if you have short nails, you can use one package for two manicures, though). Additionally, you need an LED or UV lamp to cure the gel topcoat. Sally Hansen is selling a starter kit for around $30, but any lamp meant to cure nail polish will work – more on that later!
You can see all the designs on the Sally Hansen website here, and select shades are available for purchase on Drugstore.com (the starter kit is out of stock at the moment, though).

Sally Hansen Insta-gel nail strips – contents |
Each package of strips contains several items; a nail file, an orange strip, two packages of nail strips, a gel topcoat, and two alcohol pads, one to clean off your nails before application, and one to use afterwards (all gel polish leaves a sticky residue that needs to be cleaned off).
Application is quite simple, and very similar to applying Sally Hansen’s regular nail polish strips; you choose a strip that fits your nail, press it down on your nail, and file off the excess. If you have short nails, you can cut strips in half and use one strip for two nails – I did this and was able to cover all my nails with one package, so I have the other one left for another time. For the insta-gel nails, you then apply a topcoat, and cure each nail under a special lamp for 30 seconds. Sally Hansen’s own lamp is only big enough for one finger, so it would take just over five minutes to do both hands. The lamp I own fits either four fingers or a thumb, so it took me two minutes total. As directed in the instructions, I used one coat of the gel topcoat. When I use the other half of this package, I’ll try using two coats of the gel topcoat and see how that affects the longevity – I think it might help.
Regarding UV/LED lamps – I got in to gel polish a while back, and first I purchased this $20 battery operated lamp from Red Carpet Manicure. However, it takes longer to use this lamp than a higher powered one, and it doesn’t have a “30 second” button / timer. So, eventually I sold it, and bought this $50 lamp which plugs in and works much faster. There are lots of other lights that are available – I know the Gelish one is popular – but I don’t have personal experience with them.
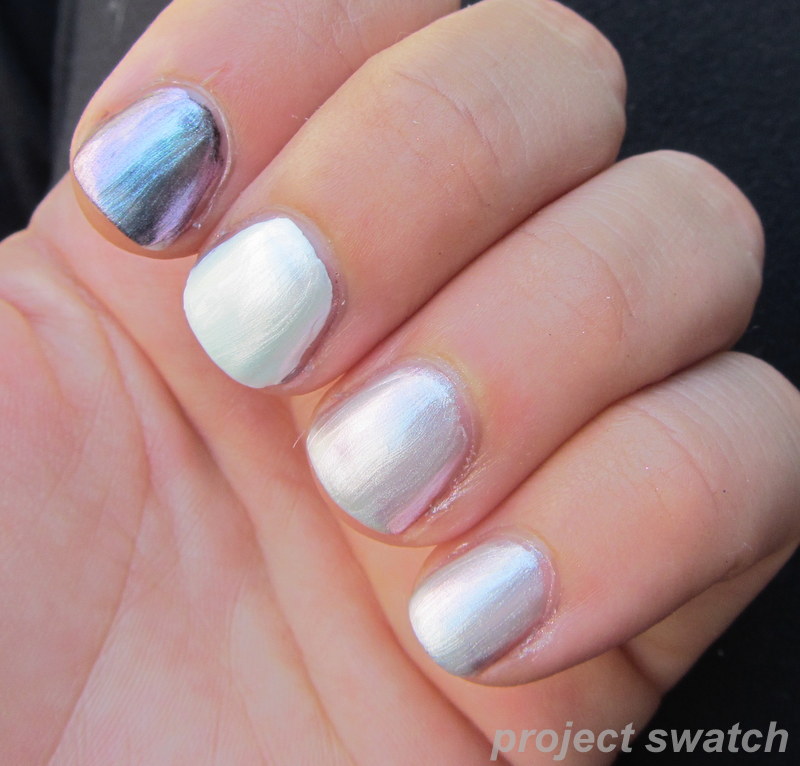
So, I applied the nail strips and it worked well; they’re very pretty and (as expected with a gel top coat), very shiny.

Sally Hansen Amazing Lace Insta-gel strips – Day 1 |
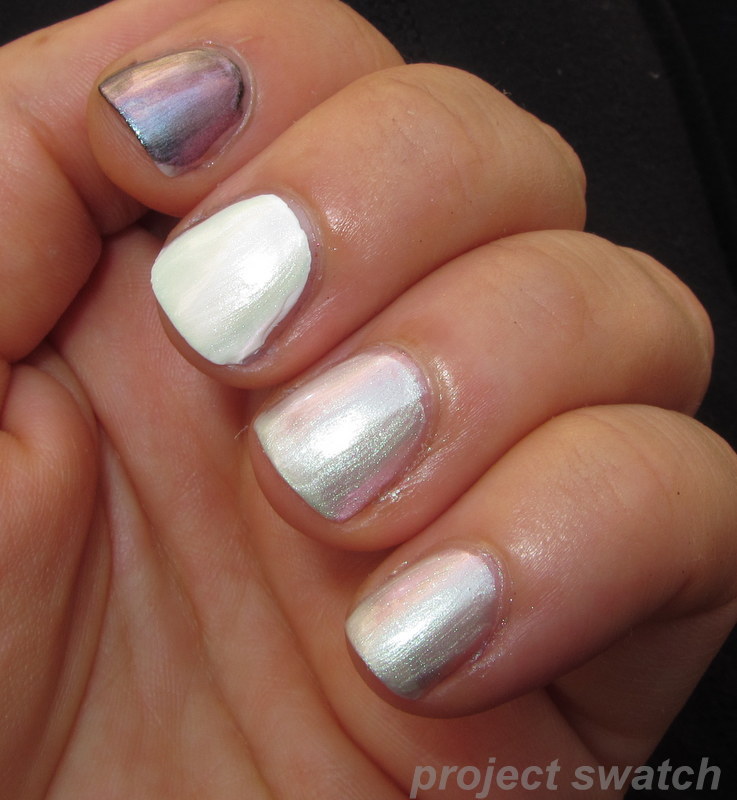
However, they didn’t last very well on me – this is Day 4, and you can’t see that the strip on my thumb has peeled off completely:

Day 4 |
I find chipped polish really irritating, so I ended up removing them on Day 4. I peeled a couple off; some were ready to come off and thus didn’t damage my nail, and some had adhered very well, and it damaged my nail very slightly to peel them off (Sally Hansen warns you not to peel them off!). I also used acetone-based remover to remove the strips from a few nails. I had to hold the remover pad on my finger for about 30-60 seconds, then the nail polish strip started to dissolve. They were much easier to remove with acetone than other gel nails I’ve had.
Four days is not a long time, but please don’t take this to mean these strips won’t work for you. I have difficultly getting polish to adhere to my nails, and four days is actually longer than most polishes last on me. I usually get about two days out of normal polish, and three days out of Sally Hansen’s regular nail strips. I’ve never had a gel manicure – even done in a salon – last more than five days. So, as a comparison, these lasted slightly better for me than Sally Hansen’s regular nail strips, and not quite as well as a salon gel manicure.
Overall, however, I would not recommend these – they are just too expensive for what they are, especially if you don’t already own an LED lamp to cure the nail polish.
Edited to add: I’ve been getting a ton of hits from google searches with some basic questions about these, so here’s a quick FAQ:
Can you use the lights from other gel polishes (Gelish, SensasioNail, Red Carpet Manicure, etc) with these nail strips?
Yes, definitely. You can use any gel polish with any gel polish curing lamp.
Why aren’t my polish strips drying?
Because you need to cure them with a LED or UV light made for gel manicures.
Can I use the gel topcoat over regular nail polish?
You can, but you have to make sure that the regular nail polish is 100% dry first – wait several hours or overnight. Some people find that using a gel topcoat really helps polishes last longer, and some people find it makes their polish peel off in sheets – it seems to depend on your body chemistry.
Can I use the gel topcoat over the regular Sally Hansen nail strips?
You can try it – and since they have no dry time, you can use the gel topcoat right away. However, like above, you may find that it extends wear, and you may find that it makes them peel off.
For even more information about gel nails, please see my FAQ here.